Mastering tutorial
Mastering is the essential last step in music production. A mastering engineer takes a mix and makes it sound right for a particular purpose. Typically, the mix is equalized, so it has all the necessary frequencies. Dynamics are then adjusted, to minimize the differences between softer and stronger parts of the recording, and finally compression is added and a limiter is employed to make the overall sound louder, a method that is now very popular. We will present one of the many ways to do this.
There are also some quotes from the Bob Katz book "Mastering audio" , which is definitely worth reading if you are serious about making music.
Before you start mastering
- The best mastering is no mastering at all!
If you think that your mix is perfect as it is, don't process it anymore. Each step in the processing chain adds extra noise and distortion, digital or analogue, it is always there. - Get the best mix quality you can!
The better the mix, the less processing needed at the mastering stage. However, your mixes should not contain compression or be equalized too much. Once something has been changed, it is hard to undo it. - Recommended sampling rate is 96 kHz.
There will be some nonlinear processes, especially when limiting. And since we don't care here too much about latency and CPU consumption, using 96kHz can easily be justified. Many low-end studios still record in 44.1 kHz. If that is the case, you should use your DAW to increase the sampling rate of the mix to 96kHz for mastering. - Always export your mixes in 32-bit floating point format.
Audio degradation when truncated to 24-bits is typically not audible, but further processing can exaggerate the defects. 16-bit audio degradation is often audible on good studio monitors with very dynamic audio materials. - Be aware that your ears will soon think your sound is great even
if it is not ;).
You can either switch between multiple tracks in your DAW or use a specialized tool such as MCompare, which lets you easily compare your master to the original and other reference tracks and even avoids you getting fooled by your own ears due to the perception differences caused by loudness. - The 'Loudness war' is not a good thing...
Modern pop-songs have almost no dynamic range compared to recordings made 20 years ago. It all started when someone discovered that songs sound better when they are played louder. Modern digital processors are able to increase the volume of songs so much that when compared to their older versions, they sound many times louder.
However the dynamic range is sacrificed. You can hear that most modern songs sound the same from beginning to end. In order to increase the volume to these incredible levels, dynamics of the music is removed or reduced. Therefore, always increase the volume only as much as necessary, not one single dB more! It may sound better, but only for a few seconds! - No peaking!
You will create a chain of effects, with each one performing some particular operation on the sound and very often this sound may get amplified. Most plugins have a gain control and a peak meter to ensure that the output isn't clipping. It may go into the red zone, but not above, otherwise the sound may get distorted, when bypassing an effect for example.
Moreover, if the output of every effect has approximately the same level as the input, then you can bypass any effect in the chain to check the sound without it. It doesn't always work, but it can help a little.
1. Manage the stereo field
One very hard task of a mixing engineer is to prepare a room for the instruments. In a good mix your brain should be able to identify each single sound source and place it somewhere in the space. This can be managed by various panoramas, reverbs and delays.
When mastering you should ensure that the depth of field is preserved. You can start by checking if there is a good amount of stereo field and correct it if necessary. MStereoProcessor is a tool designed for this purpose.
MStereoProcessor is a 4-band stereo field enhancer and exciter. Use the Widening parameter to make each band wider, or, more 'monophonic'. It's usually recommended to keep the bass more monophonic, for example. You can use the Exciter to improve the clarity of a band but do NOT overuse it! Delay widening can be useful to add additional stereo content, but use it only if really needed. The goal is not to make an artificially stereo-sounding output, but to control the stereo content.
The resulting signal in the stereo field view (on the right of the plug-in) should form a nice vertical ellipse, not too wide, and not too thin. You can always use the MStereoProcessor to compare the width of your reference tracks!
Finally you should check for mono compatibility by using the buttons above the stereo field view. Remember that even in the 21st century your recordings should be mono compatible! When you compare the stereo and mono recordings, the monophonic one loses the stereo content, but it should still have some depth and there should be no significant frequency loss caused by phase cancellations. In extreme yet typical cases, a track may completely disappear when played in mono. Poor mono compatibility at this stage means you will have little choice but to obtain a remix as in most cases this problem cannot be fixed during mastering.
2. Balance the spectral content
Spectral content describes the proportions of frequencies in the audio. Mixes rarely have good overall spectral content, but to be fair, that is not the aim of mixing! You can usually fix this using an equalizer, however very often these imbalances are not constant but are changing during the song.
Spectral content affects the overall loudness a lot. Our brain adaptively masks silent frequencies in order to let us listen to what is important - what is loud. Therefore the loudest recording has equal power over most frequencies consistently (note: this is heavily simplified!). There is an extreme case - white noise. It is a signal, that has the same magnitude for all frequencies. I bet it is louder than any of your recordings! Keep in mind though, that every dB you increase in loudness is lost somewhere else.
Spectral balancing and other problems are generally fixed using multiband compressors such as MDynamicsMB. They will also reduce the dynamic range. Generally, you use equally distributed bands, about 4 or 5 is usually enough. Set the threshold of each band to a similar value, and the ratio to about 2:1 and then tweak all of the bands. Remember, the less you change the better.
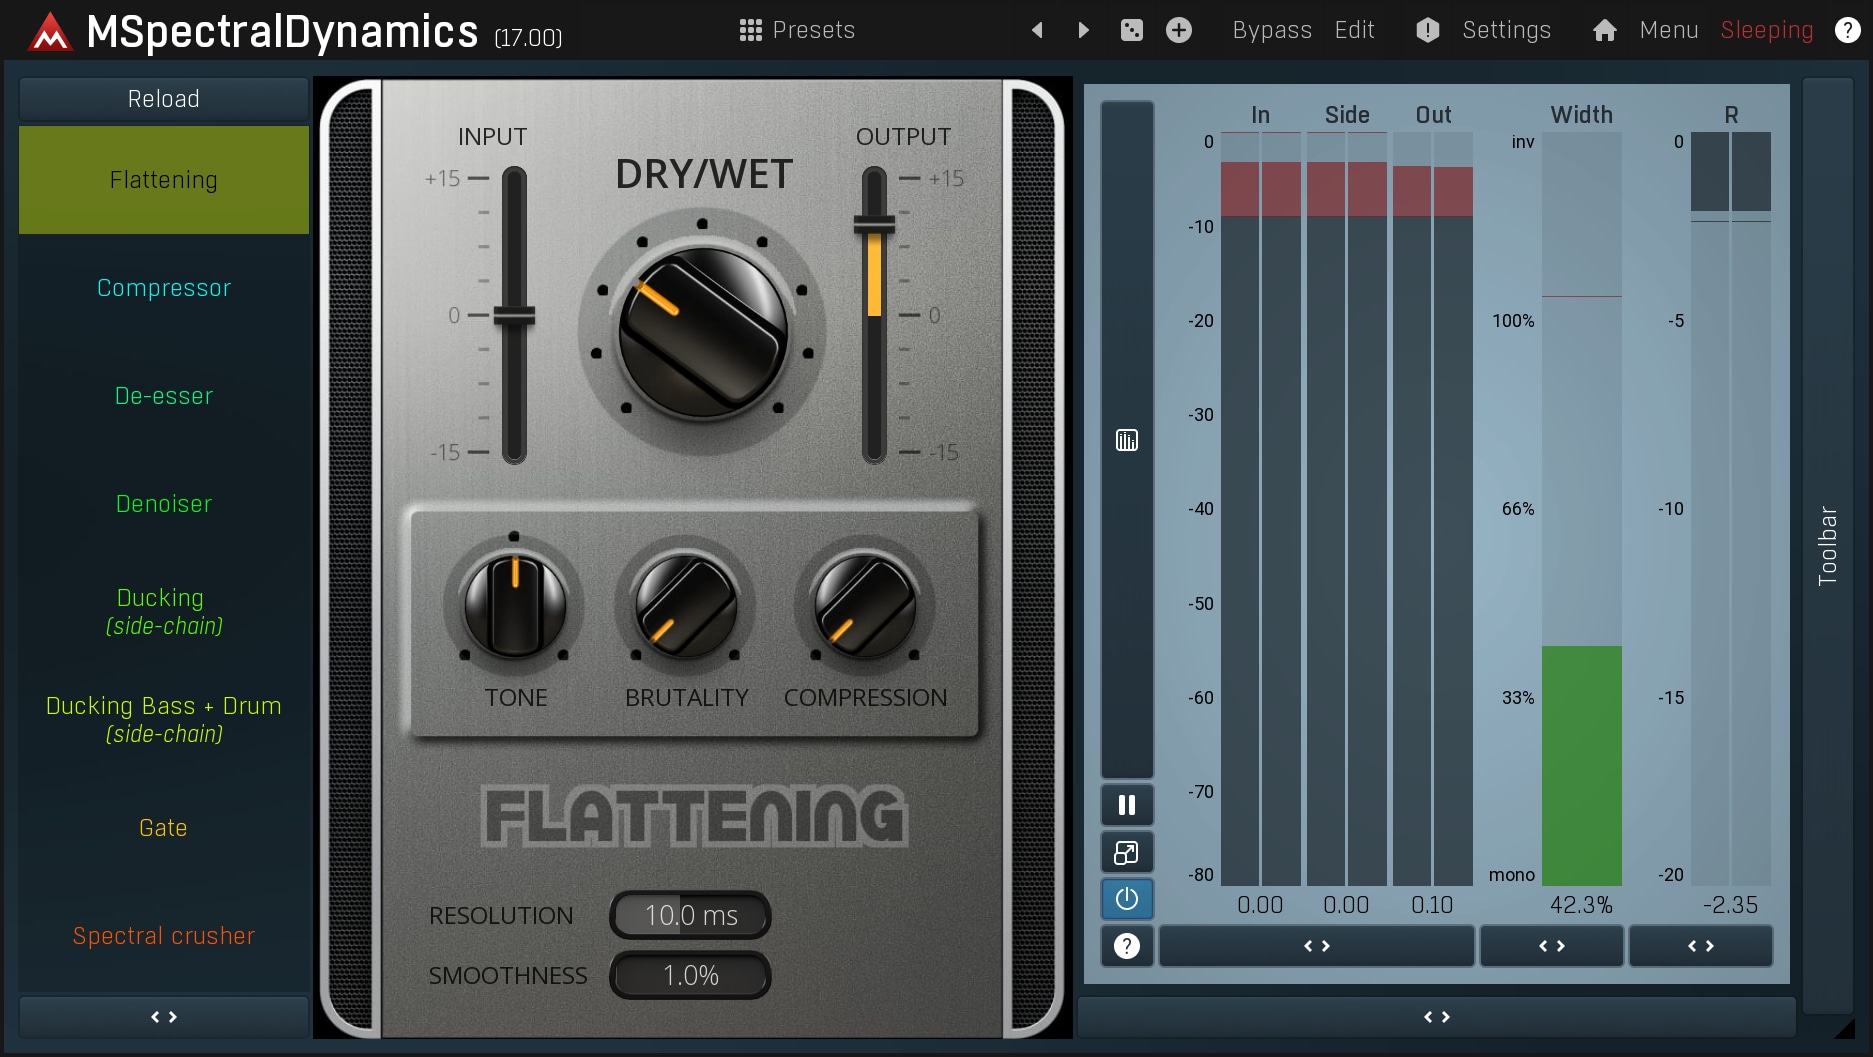
We also have a more modern solution - MSpectralDynamics. At first look this tool may seem over-complicated, but in reality it's much simpler and safer than using multiband dynamics of any kind.
In the spectral view you can see the power of each frequency. In an extreme case this would form a horizontal line. For starters use the orange line to adjust the Threshold of Processor 1. The lower it is, the more dynamics you lose and the more balance you get. The next important parameter is the Ratio of Processor 1. We'd recommend starting with one of these settings:
- Lower threshold and a very low ratio (e.g. 1.10:1) - this would apply a mild compression along the spectrum.
- Lower threshold a little under problematic peaks and higher the ratio (e.g. 2:1) - this lowers louder frequencies and makes the quieter ones more audible.
After that you can experiment with the various parameters or presets. You may be surprised at what was not audible in the mix before processing. But be very careful not to overuse this tool! If you don't need it, don't use it!
3. Compression
As we've mentioned already, the modern trend is to over-compress recordings in order to make them loud from beginning to end. So, please read the following advice and remember - if you don't need it, don't do it!
If you are new to this, it will take a lot of time before you will be satisfied with the results. A certain amount of experience is necessary.
Macrodynamics
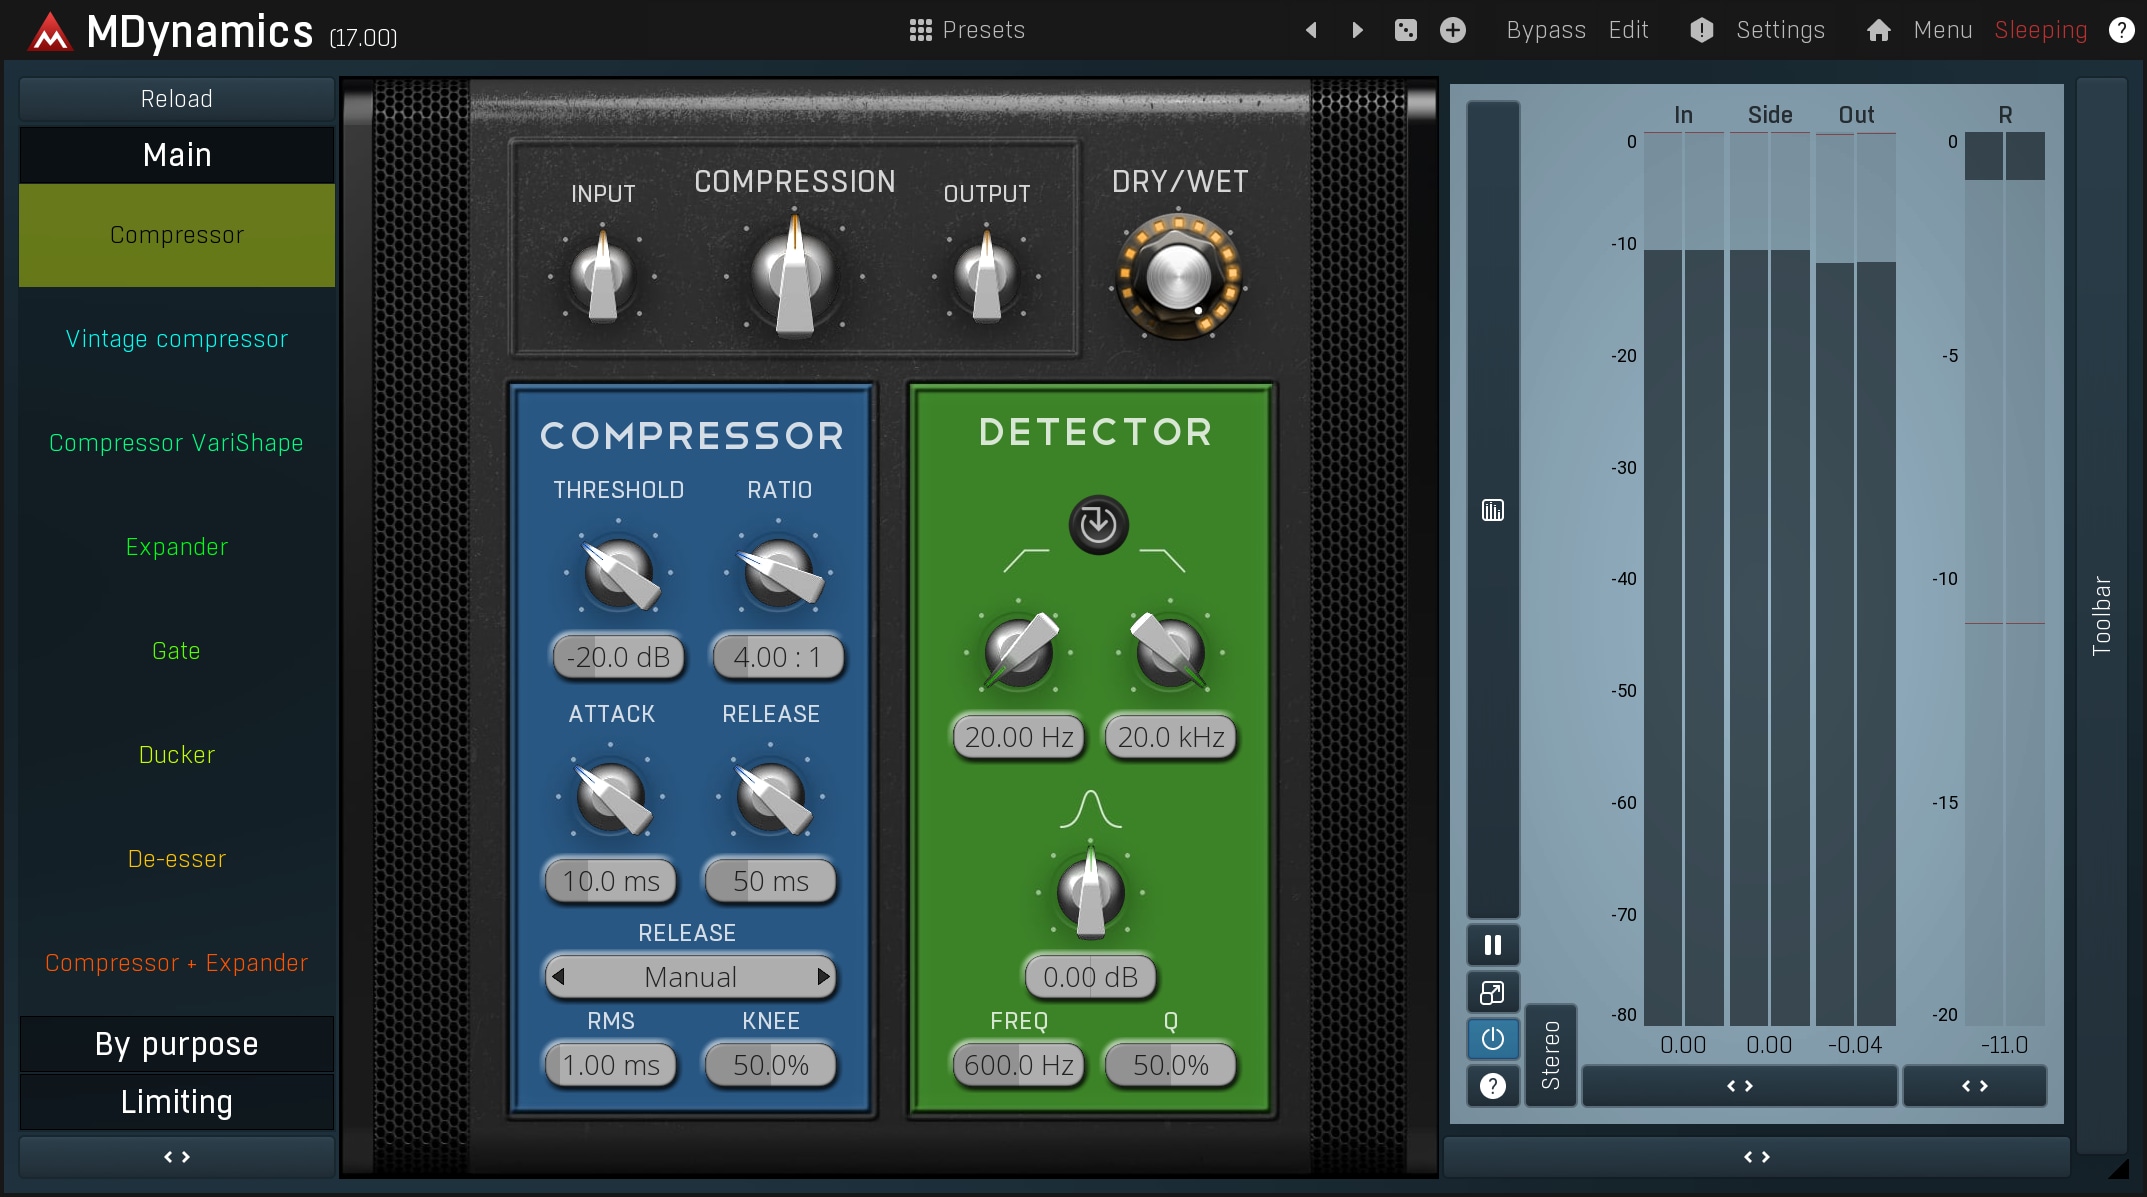
Your first aim is to make your song sound consistent - ensure that each refrain is not much louder than a verse etc. The best way to do this is using envelopes in your DAW to manually manipulate the gain; but that can be a lot of work. But if you are as lazy as I am :), you can start by adding MDynamics to the processing chain with following parameters:
- Attack time: longer, let's say 100ms, we want
to keep the transients.
- Release time: longer, let's say 1000ms, we
don't want MDynamics to think
the (louder) chorus ended just because there is a short silence.
- RMS length: longer, as we don't want it to respond to peaks, but rather an overall level.
- Threshold: play the verse and then the chorus. The vertical line on the graph indicates the current level. Place the threshold for Processor 1 (the only one enabled) just above the level that was measured for the verse. The verse will now be below the threshold, and therefore not processed, while the chorus will be above the threshold, hence its gain will be reduced.
- Ratio: the higher the ratio, the more reduction and loudness you will get, and, the more dynamics you will lose. Set it at 1.5:1 for starters, then play the chorus and the verse to check if they are similar enough.
Please note the Maximize option, which can make the result exceed 0dB. Be aware that you can use the Output gain to ensure that the result does not peak.
Microdynamics
You may want to remove peaks and make it sound louder. We repeat again - if you don't need it, don't do it! The loudness will be increased in the final part as well! However, if you want to try, create another instance of MDynamics with following parameters:
- Attack time: short, let's say 10ms.
- Release time: short, let's say 100ms.
- RMS length: short, but probably not minimal (peak).
- Threshold: overall level should be pretty consistent due to the previous macrodynamics stage. So play the chorus and set the threshold slightly below the current level (vertical line).
- Maximize: in this case you may want to disable it. Anyway you will have to use Output gain to ensure the result is not peaking but is loud enough.
- Ratio: as before, the higher the ratio, the more reduction and loudness you will get, but the more dynamics you will lose. Set it at 1.5:1 to begin with. Then play the chorus to check for distortion.
You could also use a multiband compressor such as MDynamicsMB. It would theoretically be more transparent, avoid pumping a little better and balance the spectrum, but it has many more parameters and is easier to over-use. However, if you want the best quality and have the time available, then go for it.
4. (Auto)Equalization
This will finally make the spectrum sound professional. This is the most important part. Even the compression stage is expendable, but this has to be done.
Some of you are may wonder why we have put the equalization after the dynamics. This is because the compression may change the spectral content, so we feel it's prudent to put the equalizer here although it is your choice. Probably the best solution is to place another equalizer before the dynamic processing, however we want to keep this tutorial simple.
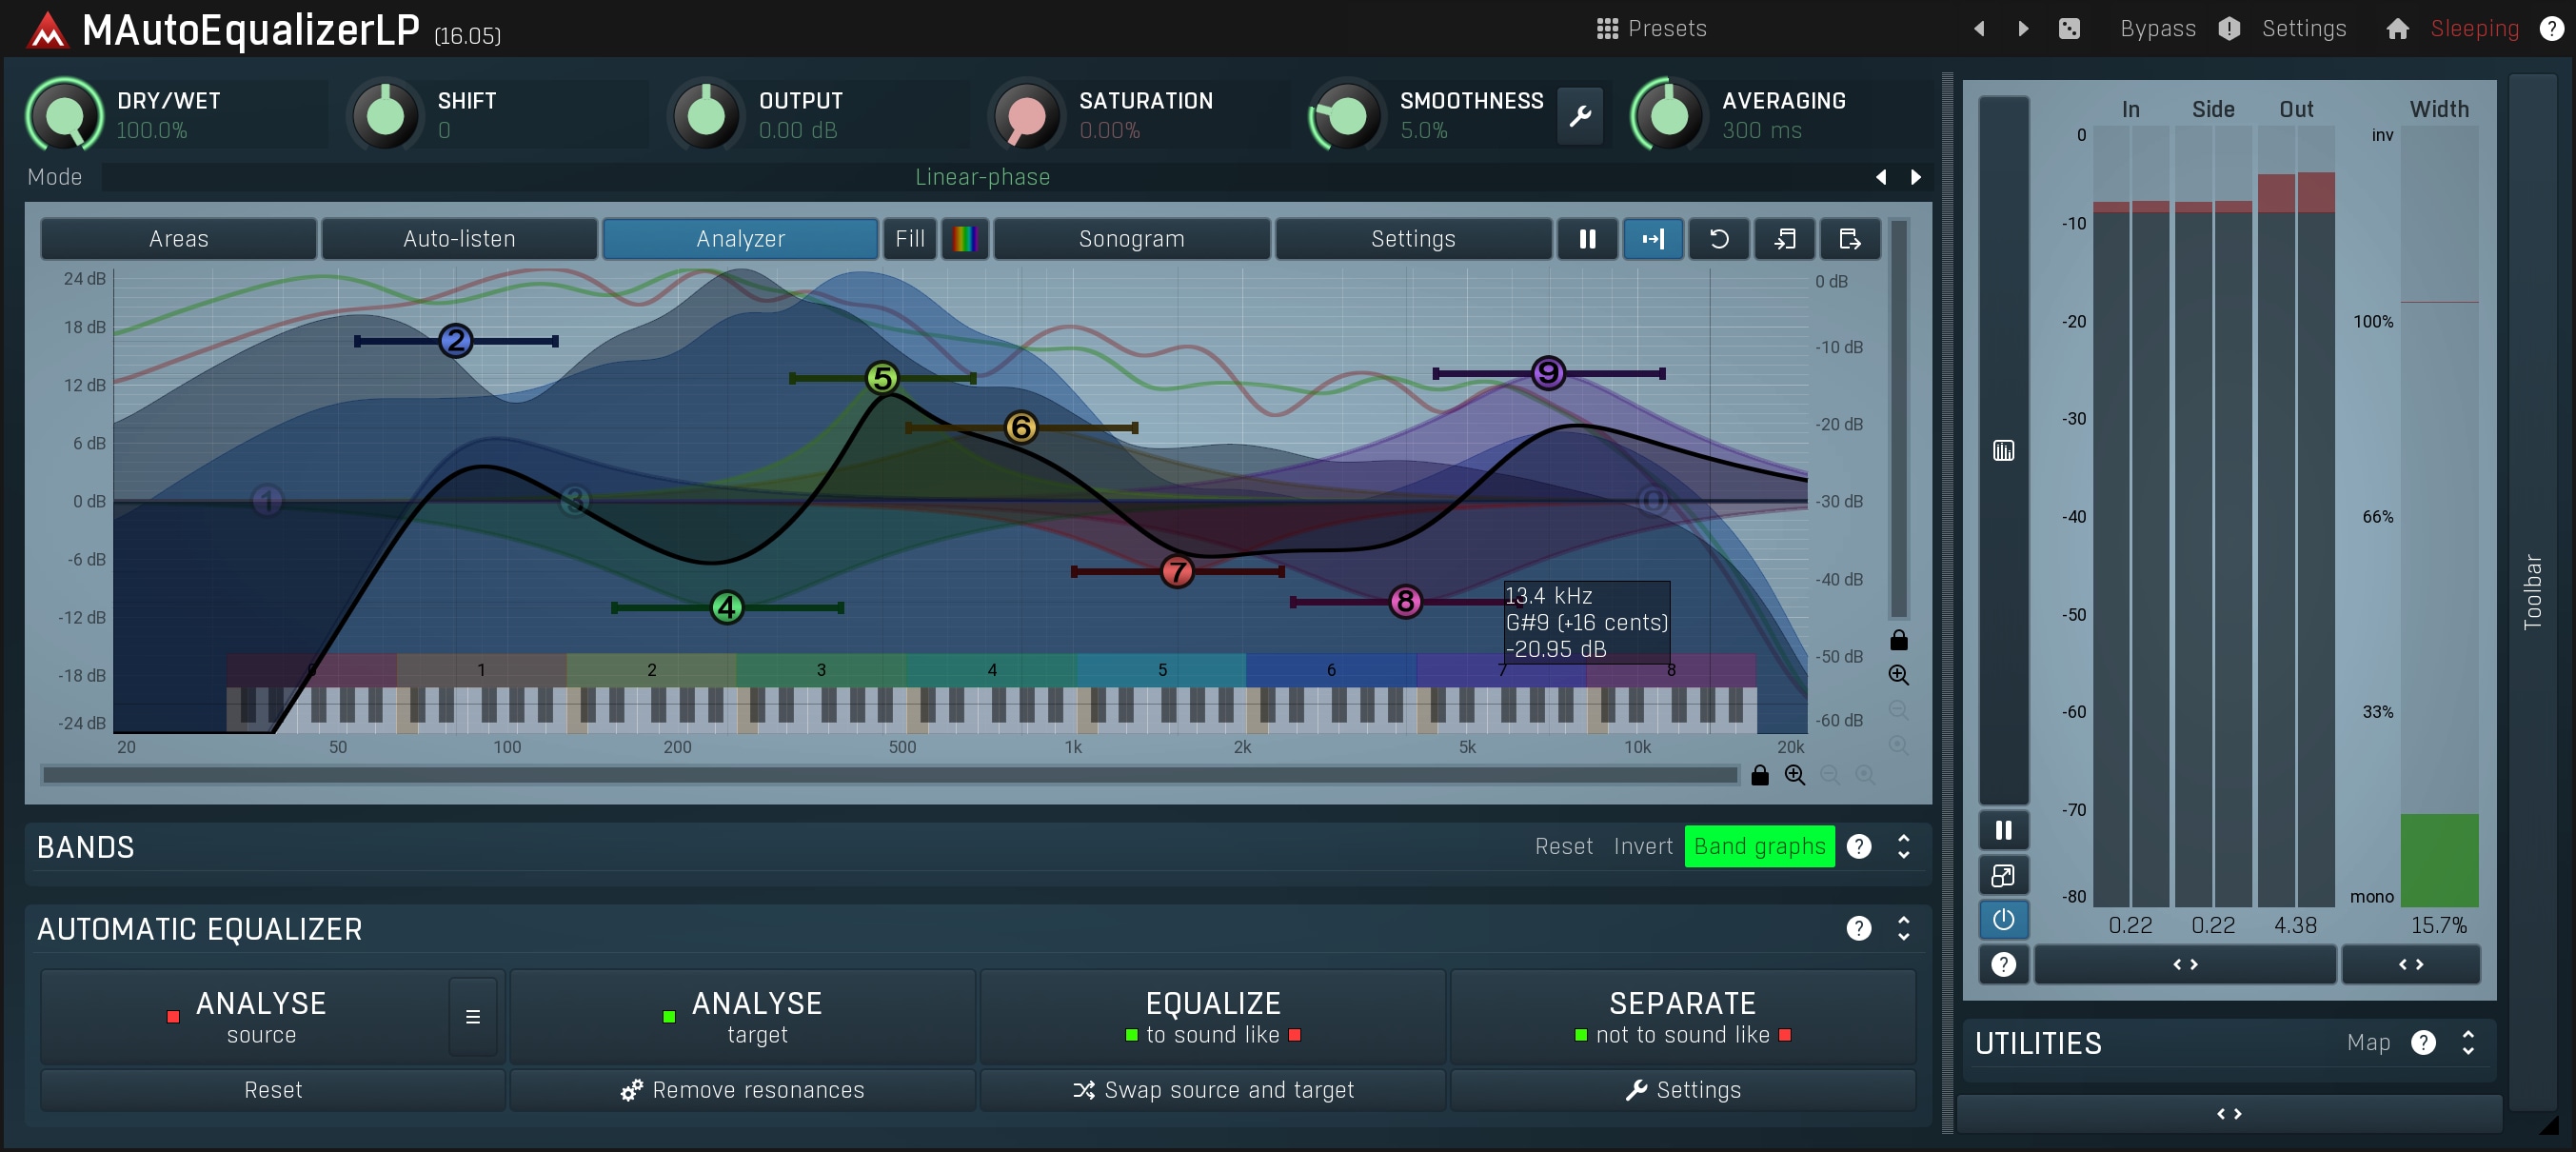
- Load MAutoEqualizerLinearPhase, start playback and press Analyze target. A curve will be shown but leave the playback enabled until the curve stops moving. It is a good idea to play different parts of the song, so that the analysis is objective, however the loudest part of the song is the most important as usual. After the analysis has finished, press the button again to stop it.
- The next step is to get a comparison of the track that you want your recording to sound like. You can either use the Analyse source button and follow the same process as in step 1 above now using your comparison song instead as a source, or simply load a predefined comparison using Comparison / Load.
- Click Equalize. The plugin adjusts the parametric bands for you. It is probable at this stage that the result may sound a little unnatural. This is due to the fact that you are not yet accustomed to it. Also that the comparison may not be ideal and you may have try another one. However, you can start by lowering the Dry/wet ratio until the result sounds good and natural. Usually 30-50% is reasonable. Remember to check the Gain parameter to ensure the result is not peaking.
Up to this point you have been working with a song with very different spectral content, and your ears have adjusted to it. You now have to switch between tracks a lot, mostly between your song and the comparison, in order to give your ears time to be able to compare the recordings objectively. If anything is wrong, don't hesitate to use the equalizer manually, as you can always perform the auto-equalization again!
5. Limiting
And here we are. By now you should have a nice sounding master, the last thing we can do is to make it sound louder, hence "nicer" :).
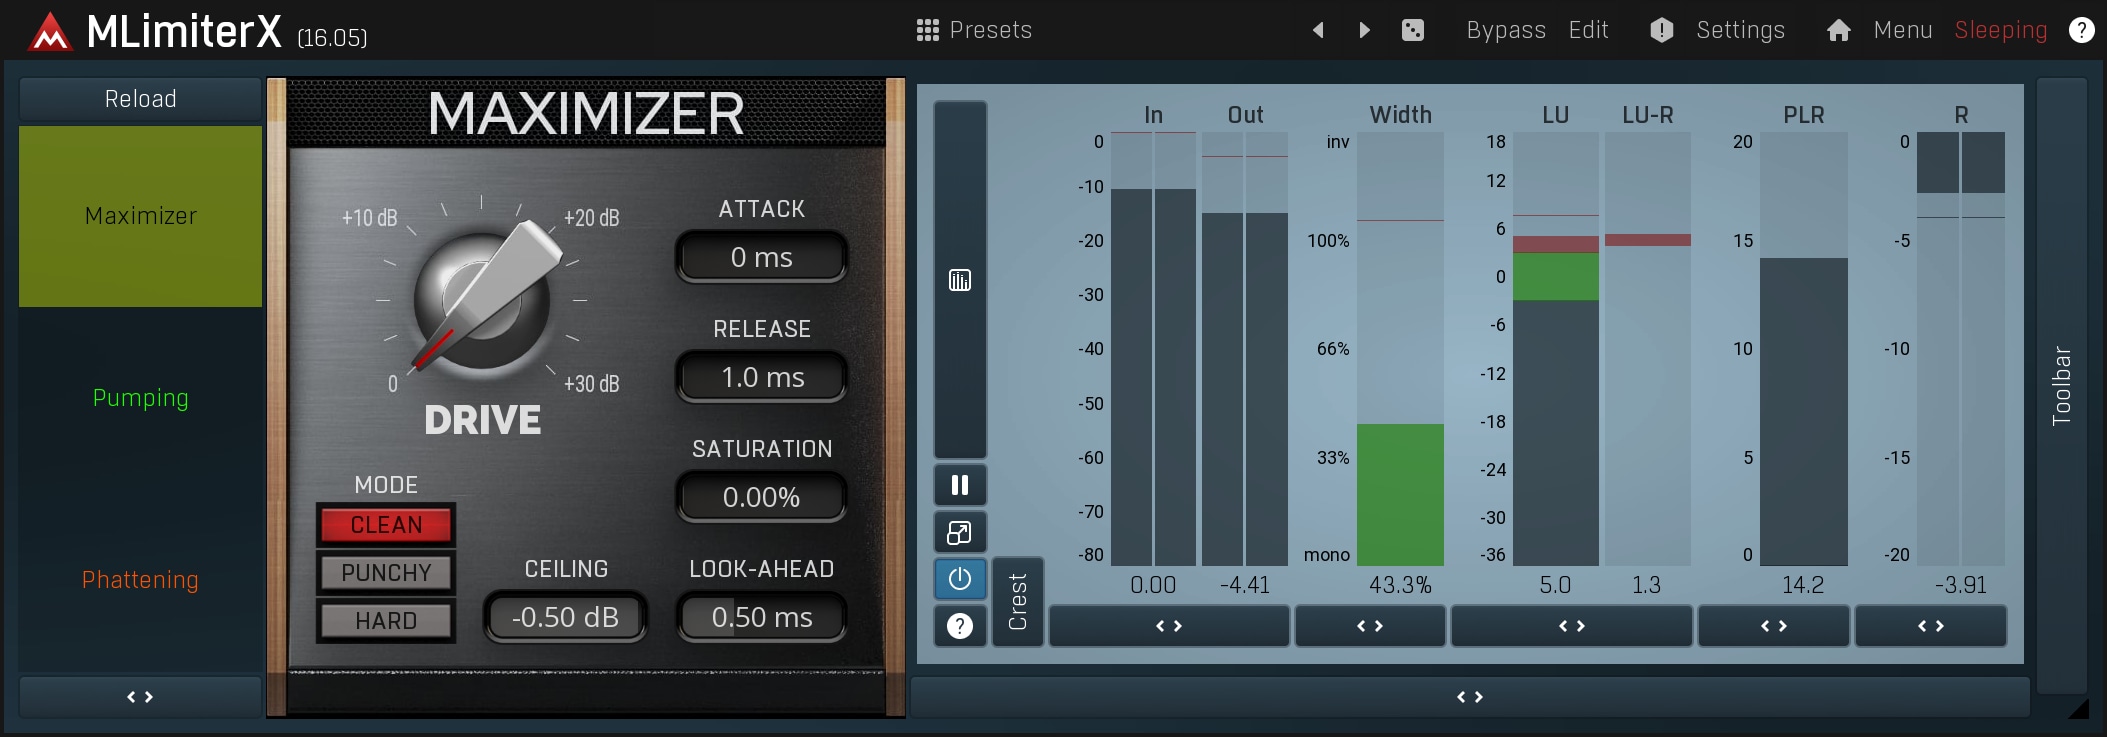
- Load MLimiterX. Play the loudest part of the song. Move the Drive to minimum if it's not there already. Now there is no limiting, so only clipping or saturation is performed. Watch the peak meter and use the Input gain to lower the level if necessary. The input should not be peaking!
Increase the Drive very slowly to the point where the output loudness is similar to your reference track.
The meter above the peak meter is called the gain reduction meter and it shows how much of the track dynamics you have lost. Finally you can use Saturation carefully to increase the loudness even more. Alternatively, you can use MSaturatorMB to perform the saturation, but in that case, be even more careful.
You can get more transparent limiting using a multiband limiter, but be extremely careful!
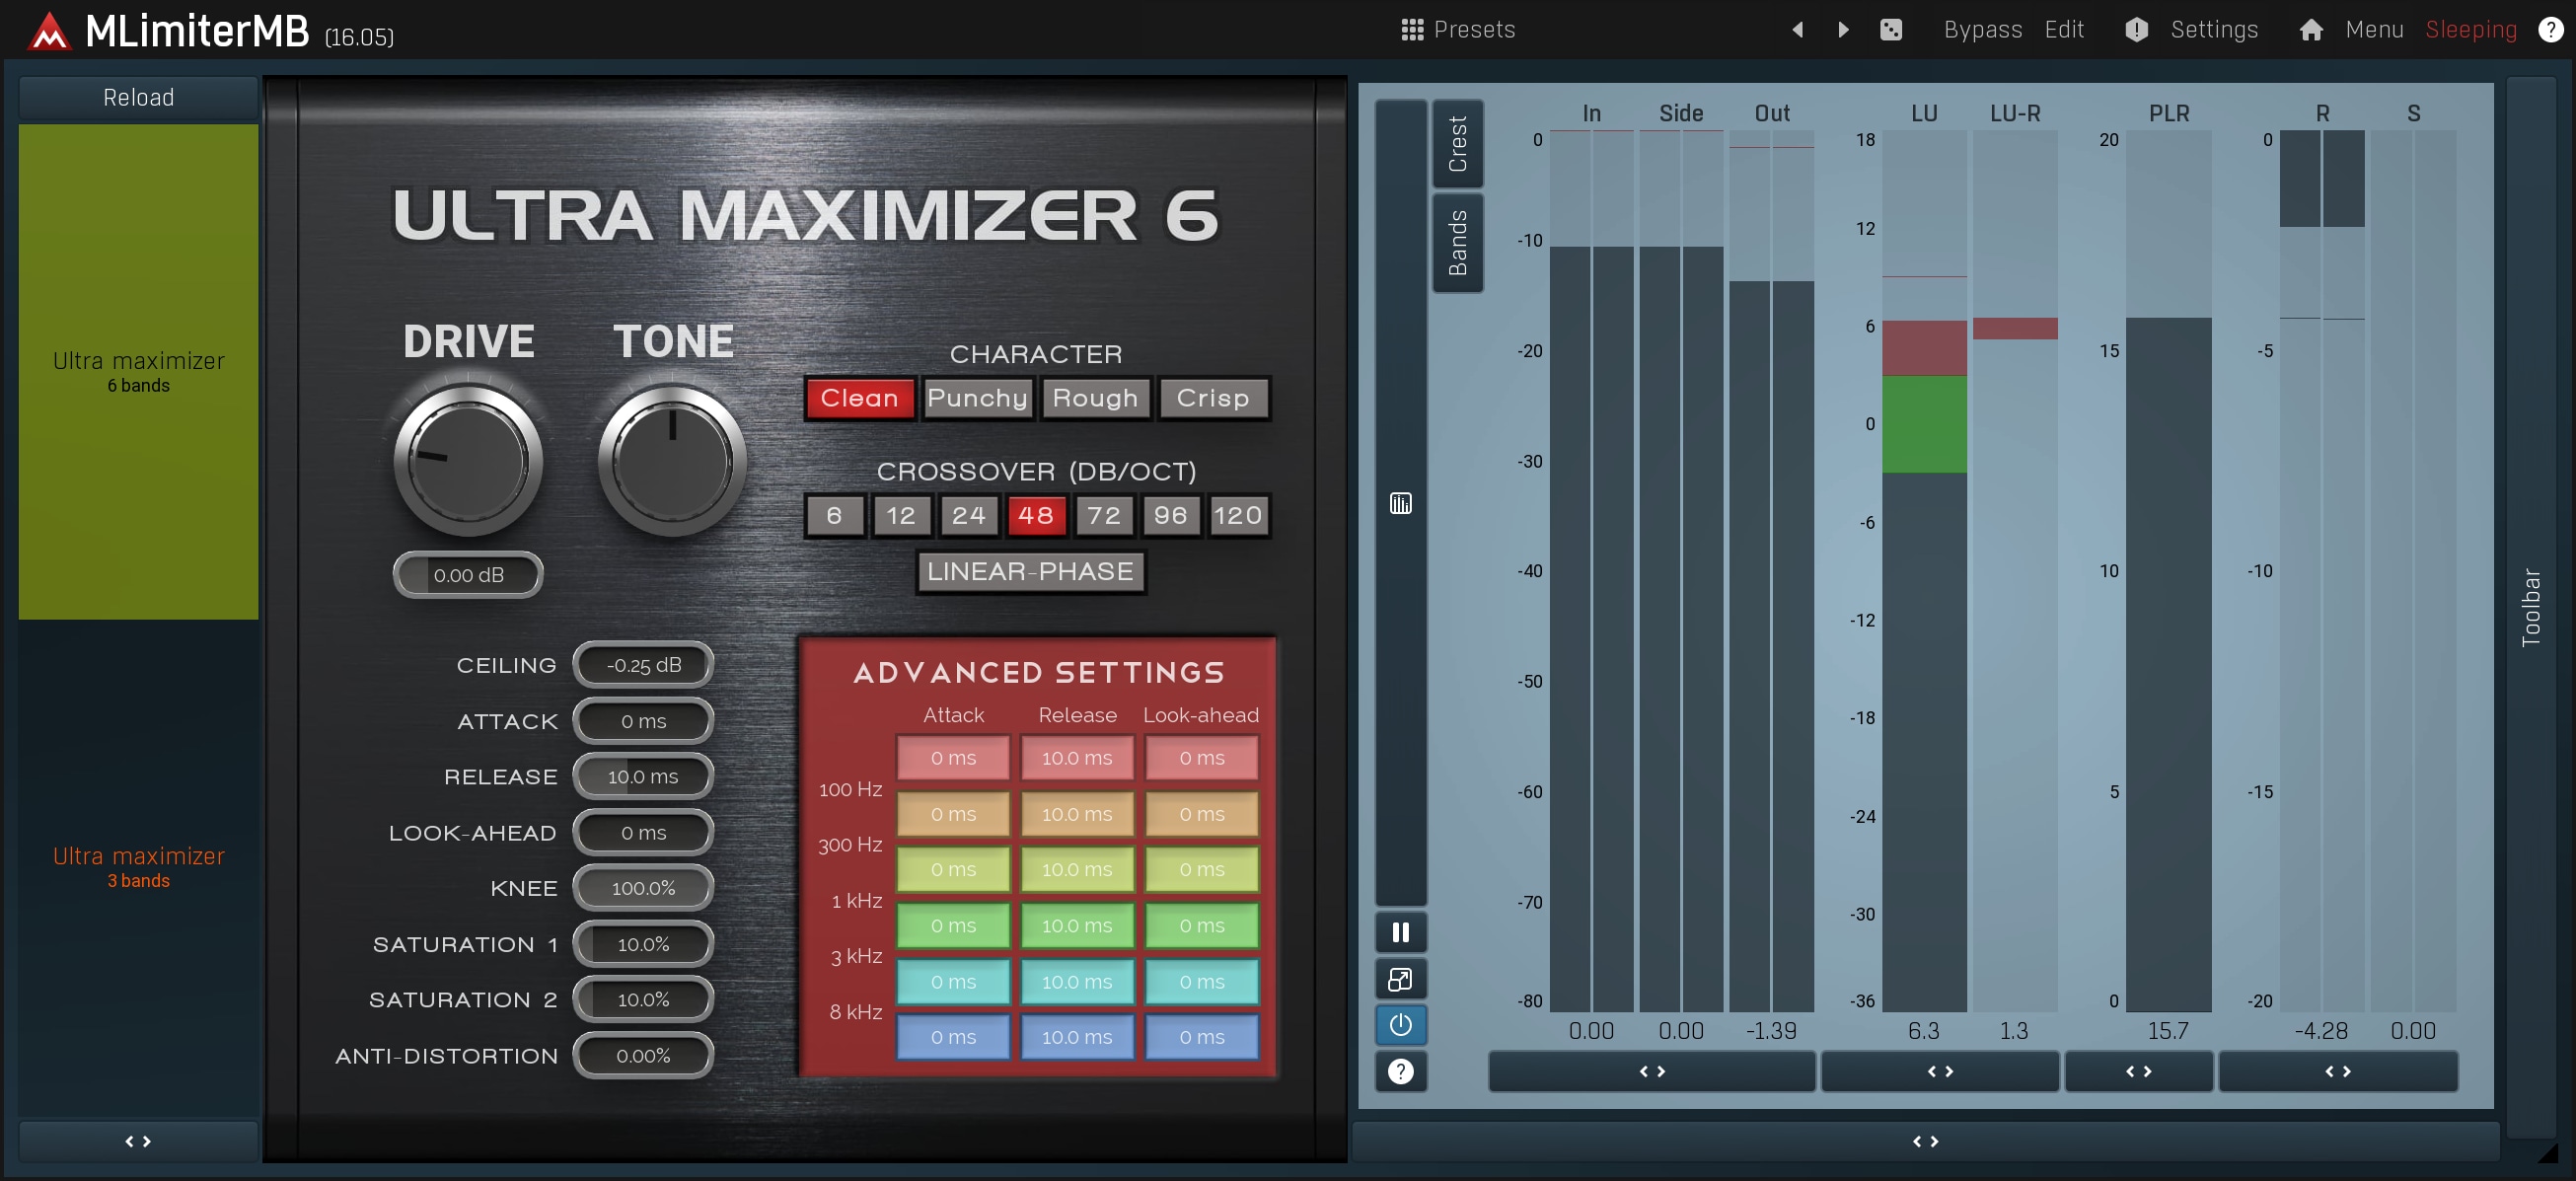
Multiband limiters such as MLimiterMB or its simplified version MUltraMaximizer can provide a higher level of loudness than single-band limiters just by increasing the Drive parameter. Because each band is limited separately, by increasing the input gain you also balance the spectrum and get closer to the white noise we talked about above. This tricks the brain into thinking that it sounds better.
Working with a multiband limiter is not too difficult. Just increase the input gain and watch the meters on the right, especially R, the gain reduction meter, and S, the saturation reduction meter. Saturation reduction causes distortions, and gain reduction causes pumping. Finally, when you think some bands are affected more than others, you can use separate thresholds or band input gains for them.
- Listen closely to the results and if you hear any unpleasant distortions, clicks or pops, increase the threshold (decrease drive) or remove saturation. If none of this helps, decrease the input gain. If there are still artefacts present, bypass the limiter as it is very probable that the distortions are generated by any of the previous steps (probably dynamics) or are even contained within the mix!
- Lower the ceiling parameter to say -0.5dB. This is basically just output gain, but some media (mp3 encoding) can by its nature create output levels after decoding higher than the original. So although we have room up to 0dB, it is a good idea to keep the output slightly lower.
And finally, the golden rule as usual - listen. Switch between tracks and compare. Don't make your recording louder than the comparison, there is too much to lose. Compare it to the original too, to see if the mastering has helped. And don't forget to listen to the quiet parts of the song as well, since the processing might also have amplified any noise etc.
6. Exporting the result
When your master sounds good, go away, grab something to eat, watch some TV, and ideally go for a walk to clear your head, particularly your ears. When you get back, which should be at least a few hours later, listen again. Still sounds good?
Great! Let's proceed to the export. Use the export/mixdown feature of your host to generate a wave file at the same audio quality, preferably 96 kHz and 32-bit floats. At this stage you can add some fade-ins/outs if necessary.
Now you have the finished recording at the highest quality. Use your DAW to create a file in the format you need. In most cases you will be down-sampling to 44.1 kHz and decreasing resolution to 16-bits. Dithering is recommended here, but for modern high-loudness music it rarely makes a difference.


